The Facebook pixel is the magic piece of code that makes all our wonderful re-targeting ads work! The pixel starts collecting data from the moment you install it to your website, so even if you’re not ready to run Facebook ads yet be sure to install it now ready for use later.
To create a Facebook pixel head to https://www.facebook.com/ads/manager/pixel/facebook_pixel or navigate to Pixels from your Ads Manager or Business Manager dashboard.
![]()
Give your Facebook pixel a name that represents your business then click Create.
![]()
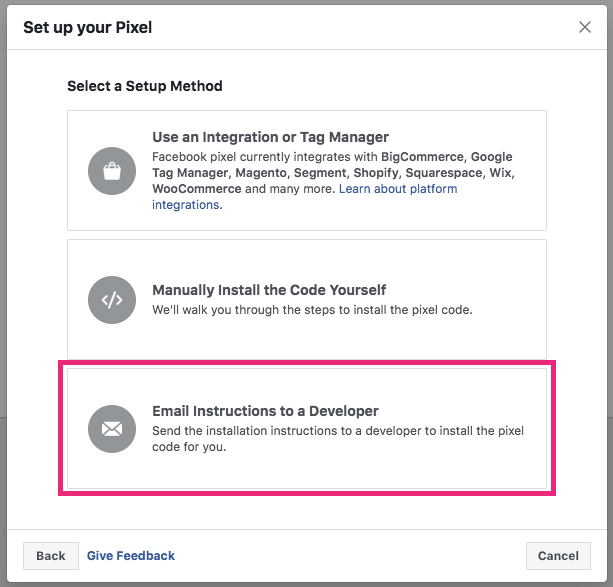
Your pixel is now created and you are given 3 options for installing it. Let’s take a look at those options.
Option 1: Integration Manager
![]()
If you choose to use the integration manager you will be shown a list of Facebook partner platforms available. Select the one you use for your website and Facebook will give you instructions for installing your pixel.
See also How to install the Facebook pixel.

If your website platform is not listed you can request a new partner but you will need to install the code manually for now. Search your website platforms forum or support pages for instructions on how to install the pixel. If you can’t install the pixel on your website platform you need a new website!
Option 2: Manually install the pixel
![]()
If you’re pretty handy with website code or even have a basic understanding you can install the pixel yourself between the <head> and </head> tags on your website. It’s just a matter of copy and paste. This can be a nice way to save on plugins which can slow down your site and need updating periodically.
![]()
Option 3: Email the Instructions to your web Developer
This option is for if you really don’t want to do it yourself. Facebook gives you the option to enter the email of someone to send the instructions to including your pixel code. For most websites this is a 5 minute job so keep that in mind when negotiating a price, as most web developers have a minimum time they charge out you may want to request it with a few other changes you want.
![]()
Check your Installation
Once you have installed your Facebook pixel it is important to make sure it worked! You should only have one pixel code installed on your site and it should match the Pixel ID of the one you just set up.
Install the Chrome Extension – Facebook Pixel Helper. Once the extension is installed on your Chrome browser, visit your website. Click on the extension icon to see which pixels are firing.
![]()
You should have green ticks for the PageView pixel on every page as well as Microdata Automatically Detected.
Depending on how you installed your pixel you may already see some custom event pixels such as ViewContent, AddToCart and Purchase. The ViewContent will show a yellow tick until you connect it to a Facebook Product Catalogue.
If you have any red errors instead of green ticks then follow the instructions provided by the pixel helper to fix the error.
Congratulations on installing your Facebook pixel!


Trackbacks/Pingbacks